PREGĂTIREA SEMINŢELOR PENTRU RĂSADURILE DE LEGUME. DEZINFECŢIA, UMECTAREA ŞI CĂLIREA SEMINŢELOR DE LEGUME

Autor: Lavinia Rorich

pregatirea-semintelor-pentru-rasadurile-de-legume-dezinfectia-umectarea-si-calirea-semintelor-de-legume


Există câteva tehnici ecologice de pregătire a seminţelor care, deşi nu sunt obligatorii, ajută la încolţirea mai rapidă şi la obţinerea unor răsaduri de calitate. Acestea sunt dezinfecţia, umectarea sau umflarea, încolţirea forţată şi călirea.

Dezinfecţia seminţelor este necesară mai ales dacă acestea provin din gospodăria proprie. Seminţele din comerţ sunt de obicei tratate deja - prin metode ecologice sau nu, asta depinde de producătorul lor. O metoda ecologica de dezinfectare a seminţelor este tratarea cu căldură - o metodă simplă, uşor de realizat. E nevoie numai de un termometru de apă capabil să măsoare peste 50 de grade Celsius şi de multă atenţie. Seminţele se pun într-un săculeţ şi se introduc într-un vas cu apă încălzită la o anumită temperatură şi se ţin acolo o perioadă de timp. Tempeatura şi timpul diferă în funcţie de specia de legume: ardei, vinete, varza - 50°C/30minute; tomate - 52-54°C/1h; castravete, pepene - 35°C/1h. După dezinfecţie, seminţele se scot din saculeţ şi se întind pe o hârtie ca să se răcească.


Umectarea (umflarea) este un procedeu care se aplică în primul rând seminţelor care încolţesc mai greu (cum sunt ceapa, ardeiul, prazul sau vinetele) şi care face ca plantele să răsară mai repede. Pentru umectare, seminţele se pun în săculeţi confecţionaţi din pânză rară şi se introduc într-un vas cu apă la temperatura camerei pentru o perioadă de timp care depinde de la o specia la alta: ceapa, praz, telina > 48-60h; ardei, vinete, tomate > 24-48h; castraveti, pepeni, dovlecei > 12-20h; varza, conopida > 2-4h. Pentru a nu se deteriora, seminţele care se ţin în apă mai mult de 24 de ore trebuie scoase şi aerisite o dată pe zi, timp de 10-15 minute.

Încolţirea forţată se face imediat după umectare. Seminţele umflate se mai ţin 2-3 zile la temperatura camerei pentru a se usca (dar se stopesc totuşi cu puţină apă), timp în care le crapă coaja şi pot chiar să încolţească, după care se seamănă în răsadniţe şi se udă.

Călirea seminţelor se aplică la culturile timpurii, pentru ca răsadurile să reziste mai bine la frig. Operaţiunea se face imediat după umectare, se poate suprapune cu încolţirea forţată şi constă în ţinerea seminţelor la cald (temperatura camerei) timp de 24 de ore şi apoi la rece (1-4°Celsius) pentru alte 24 de ore.

După toate aceste tratamente, seminţele se pot semăna în răsadniţe.

Build a $300 underground greenhouse for year-round gardening (Video)

http://www.treehugger.com/green-architecture/build-underground-greenhouse-garden-year-round.html


Growers in colder climates often utilize various approaches to extend the growing season or to give their crops a boost, whether it's coldframes, hoop houses or greenhouses.
Greenhouses are usually glazed structures, but are typically expensive to construct and heat throughout the winter. A much more affordable and effective alternative to glass greenhouses is the walipini (an Aymara Indian word for a "place of warmth"), also known as an underground or pit greenhouse. First developed over 20 years ago for the cold mountainous regions of South America, this method allows growers to maintain a productive garden year-round, even in the coldest of climates.
Here's a video tour of a walipini that shows what a basic version of this earth-sheltered solar greenhouse looks like inside:
................................


How a Walipini works and how to build one
Walipini© Benson Institute
It's a pretty intriguing set-up that combines the principles of passive solar heating with earth-sheltered building. But how to make one? From American sustainable agriculture non-profit Benson Institute comes this enlightening manual on how a walipini works, and how to build it:
The Walipini utilizes nature’s resources to provide a warm, stable, well-lit environment for year-round vegetable production. Locating the growing area 6’ to 8’ underground and capturing and storing daytime solar radiation are the most important principles in building a successful Walipini.
The Walipini, in simplest terms, is a rectangular hole in the ground 6 ‛ to 8’ deep covered by plastic sheeting. The longest area of the rectangle faces the winter sun -- to the north in the Southern Hemisphere and to the south in the Northern Hemisphere. A thick wall of rammed earth at the back of the building and a much lower wall at the front provide the needed angle for the plastic sheet roof. This roof seals the hole, provides an insulating airspace between the two layers of plastic (a sheet on the top and another on the bottom of the roof/poles) and allows the sun's rays to penetrate creating a warm, stable environment for plant growth.
This earth-sheltered greenhouse taps into the thermal mass of the earth, so that much less energy is needed to heat up the walipini's interior than an aboveground greenhouse. Of course, there are precautions to take in waterproofing, drainage and ventilating the walipini, while aligning it properly to the sun -- which the manual covers in detail.
Best of all, according to the Benson Institute, their 20-foot by 74-foot walipni field model out in La Paz cost around $250 to $300 only, thanks to the use of free labour provided by owners and neighbours, and the use of cheaper materials like plastic ultraviolet (UV) protective sheeting and PVC piping.
Cheap but effective, the underground greenhouse is a great way for growers to produce food year-round in colder climates. More over at the Benson Institute and the Pure Energy Systems Wiki.

Remedii si retete pentru musculita alba

http://vasilerosciuc.blogspot.ro/2013/02/leacuri-din-gradina-pentru-prevenirea_10.html


Principalele modalitati de obtinere a insecticidelor si fungicidelor ecologice sunt
1.    Extractul = preparat obtinut la rece. Partile de planta maruntite se pun in contact cu apa 12 – 24 ore in vase de sticla, lemn sau plastic.In timpul extractiei se agita continutul din vas de mai multe ori. Extractul final se filtreaza prin panza de tifon inainte de folosire.
2.    Infuziile sau ceaiurile = se prepara din material vegetal verde sau uscat, in stare maruntita,prin turnarea peste acesta de apa clocotita,dupa care, se lasa, sub capac, pana la racirea complete.Se filtreaza inainte de folosire pentru anu infunda duzele aparatului de stropire.
3.    Decoctul sau fiertura = Mai intai se inmoaie materialul vegetal in apa din vasul de fierbere timp de 24 de ore,la temperature camerei sub capac.Apoi se fierbe continutul timp de 30 de minute.Dupa racire se filtreaza.
4.    Plamadelile = Sunt zemuri fermentate care de obicei se produc in cantitati mai mari avand o gama larga de intebuintare.Materialul vegetal maruntit se introduce in butoaie de 40 – 60 de litrii. Butoiul se aseaza intr-un loc insorit,aerisit si ferit de ploi (sopron sau copertina).Se toarna apa astfel incat nivelul acesteia sa se gaseasca cu cca 20cm. mai jos de gura butoiului(spatiu de captare a spumei de fermentare).Butoiul se acopera cu un gratar de scandura.Se agita zilnic continutul butoiului cu o lopata de lemn. Terminarea fermentarii se recunoaste prin aceea ca nu se mai formeaza spuma, iar lichidul a capatat o culoare mai inchisa.Se filtreaza inainte de folosire.
5.    Reguli de folosire a pesticidelor ecologice:
1.    Se folosesc mai intai preparatele care indeparteaza, fortifica sau protejeaza si numai la urma cele care omoara.
2.    Cea mai buna apa pentru preparate este apa de ploaie sau dedurizata:
3.    Daca in decurs de 6 ore de la stropire a plouat stropitul se repeat:
4.    Stropirile incep la primele semen de atac sau cel mai bine profilactic:
5.    Preparatele natural nu se amesteca unele cu altele pentru a combate mai multi daunatori in acelasi timp.
6.           Durata de pastrare aprepaaratelor natural este mai mica,extractele ceaiurile si fierturile se pot pastra cateva zile,plamadelile cateva luni.Preparatele lichide care au inghetat nu mai sunt bune.

Ventricea infuzie 300 g ventrice proaspata  sau 30 g uscata, se infuzeaza in 10 litri apa clocotita.Dupa ce se raceste se pul-verizeaza direct pe plante. Se poate adauga sapun lichid.
Se stropeste planta cu o infuzie de vetricea (Tanacetum vulgare) la care se adauga 3% bentonita - nu am incercat ( oricum nu am bentonita)- musculita alba


Urzica este o planta foarte utila pentru intretinerea gradinii, pentru ca ne permite sa luptam cu anumiti paraziti, precum paduchii, musca morcovului si mana.
Macerate Tocam 1 kg de urzici si le punem la macerat timp de 3 zile in 9 litri de apa.
Acoperim recipientul. Dupa 3 zile putem strecura solutia obtinuta. Se pulverizeaza in fiecare saptamana.
Extractul de urzică se obține din 1 kg de tulpini cu frunze de urzică în 10 l apă. Se lasă 12 ore, după care se folosește la combaterea păduchilor de frunze. Extractul de urzica indeparteaza acarienii
Se amesteca 1 kg de urzici verzi tocate si 10 litri de apa. Amestecul se lasa 12 ore dupa care se strecoara. Preparatul obtinut se mai numeste “zeama care musca”. Plantele stropite cu aceasta solutie sunt protejate impotriva acarienilor si a paduchilor de frunze
Continutul ridicat in acid salicilic si de acid formic face din preparatele pe baza de urzica un mijloc eficace pentru a combate numerosi paraziti animali si vegetali.
Toate formulele pe baza de urzica se prepara utilizand planta intreaga, fara radacini, in can-titate de 1 kg planta proaspata sau 200 g de planta uscata pentru fiecare 10 l apa.
Maceratul de urzica se prepara lasand urzica in apa rece pana cand lichidul devine foarte inchis la culoare, si nu mai formeaza spuma. Pentru accelerarea procesului recipientul se poate expune la soare. Faina de alge si cateva frunze de Angelica archangelica (aglică, anghelică, angelină, antonică, buciniș, cucută mare)  pot fi utilizate pentru a neutraliza miro-sul intens amanat de preparat in timpul fermentatei. Preparatul trebuie amestecat in fiecare zi, si e pregatit dupa 7-10 zile. Maceratul de urzica nediluat, este util pentru accelerarea maturatiei compostului, iar stropit pe pamant tine departe furnicile.
Diluat cu apa in raport de 1:20 rezulta eficace pentru accelerarea cresterii tinerele plante.
Cu aceasi diluare, stropit trei zile consecutiv, la interval de 2 saptamani, este util impotriva bolilor criptogamice (mucegaiurilor, boala piersicului - Taphrina deformans, boala vitei de vie cauzata de ciuperca Plasmopara viticola), numeroase insecte (musca ciresului - Rhagoletis cerasi, Tignola fasciata). Maceratul poate fi folosit si pentru a dezinfecta radacinile plantelor inaintea transvazarii.
In livada se planteaza urzica, care de cateva ori pe an se coseste si se lasa pe sol sub for-ma de mulci.
Urzica macerat  1kg la 10 l de apa, dupa care se filtreaza INSECTICID; FUNGICID: afide
ferment de urzici (1 kg de urzici la 10 l de apa), lasand plantele sa se macereze in apa, vreme de cateva zile. Sucul obtinut se foloseste la fortificarea plantelor tinere din gradina, ca si la indepartarea puricilor si a plosnitelor prin pulverizarea cu macerat. Inainte de a-l folosi, diluati-l intotdeauna cu apa (jumatate ferment - jumatate apa), ca sa nu provocati arsuri pe frunzele si radacinile plantelor.
Solutie de urzica (cu sau fara tataneasa) 1 kg urzica proaspata fara flori sau radacini
-       10 litri de apa de ploaie
Se toaca urzica mai mare,se pune in recipientul cu apa de ploaie si se acopera neaparat. Se amesteca in recipient in fiecare zi timp de o saptamana.
In acest timp urzica fermenteaza, dar emana un miros urat, fapt pentru care se pune intr-un colt mai indepartat al gradinii.dupa o saptamana se strecoara si se foloseste 1litru de solutie amestecat cu 9 litri de apa, ori stropind plantele ori udandu-le la radacina.
Daca se foloseste si tataneasa se pune in combinatie cu urzica
Extractul de urzica indeparteaza acarienii se amesteca 1 kg de urzici verzi tocate si 10 litri de apa. Amestecul se lasa 12 ore dupa care se strecoara. Preparatul obtinut se mai numeste "zeama care musca". Plantele stropite cu aceasta solutie sunt protejate impotriva acarienilor, a paduchilor de frunze si a fluturelui alb al verzei.
Purinul de urzică este cel mai bun, cel mai natural, cel maieficace dintre fertilizanţi, care alungă dăunătorii, îmbogăţeşte compoziţia solului şi stimulează imunitatea plantelor la rădăcina cărora este turnat :1 kg de urzici proaspete pentru 10 kg de apă
Materiale necesare pentru obtinerea a 200l de insecticid organic
- recipient de 200l din material nonreactiv (plastic sau lemn)
- 10-15 kg urzica proaspata sau 1,5-2 kg urzica uscata
- 200 l apa de ploaie sau de la robinet (caz in care avem nevoie de otet)
- 10 l lapte degresat, zer sau lapte sintetic
Apa folosita este foarte importanta. Ideala este apa de ploaie, deoarece nu continte minerale calcaroase sau alti aditivi, precum clorul, care pot intarzia sau chiar opri fermen-tarea. Daca totusi vom folosi apa dura de la robinet, atunci va trebui sa adaugam putin otet pentru a scadea Ph-ul. Apa de la robinet va trebui sa stea in recipient inainte de adaugarea urzicilor cateva zile pentru a permite clorinei sa se evapore. Intreaga cantitate de urzici si 100l de apa se pun in butoi. Pentru ca nu cumva sa explodeze in timpul fermentarii, ori facem cateva gauri in butoi ori ii acoperim gura cu o bucata de material textil sau o placuta din plastic. Un garaj neincalzit sau o magazie este locul ideal in care putem tine butoiul cu urzici, de a carui temperatura acesta din urma este dependent. Fermentarea poate dura intre cateva zile (3-4) pana la cateva saptamani, in functie de temperatura. Va trebuie sa amestecam fiertura zilnic si, cand amestecul nu mai scoate bule, fermentatia este completa.
Adaugam laptele degresat, amestecam iarasi pentru omogenizare si a doua zi vom filtra solutia pentru a impiedica fermentari ulterioare sau blocarea sprayerului cand aplicam fiertura pe plante. Putem filtra cu ajutorul unei strecuratori garnisite cu straturi de tifon, un tricou vechi, filtru de cafea sau alta hartie filtranta. Adaugam restul de 100l de apa. 
Insecticidul astfel obtinut poate fi depozitat in recipiente de otel sau plastic intr-un loc ferit de soare si racoros (20C). Odata ce infuzia este gata, poate fi folosita cel mai des fiind spray-ata, ca in cazul oricarui alt insecticid sau fertilizator, avand grija ca jetul sa fie directionat de jos in sus pentru a ajunge pe partea inferioara a frunzelor


Uleiul alb organic este un pesticid natural usor si rapid de preparat. Este folosit pentru a tine sub control paduchii plantelor, afidele, unii gandaci, capusele si omizile de pe trandafiri, plante ornamentale, lamai si alti copaci fructiferi.
Insecticidele comerciale pe baza de ulei alb sunt facute din produsi petrolieri, sunt scumpe si, de asemenea sunt exact genul de produse pe care nu vreti cu adevarat sa le imprastiati in jurul gradinii. Uleiul alb traditional este o reteta pe baza de ulei vegetal si a fost folosit de circa doua sute de ani. Daca a functionat tot acest timp, functioneaza si acum!
Cum se prepara Uleiul Alb
                Aveti nevoie de: 2 cani de ulei vegetal, ½ cana de sapun lichid pur (reteta originala este cu sapun lichid organic cu ulei de masline, dar mai jos e si reteta cu sapun solid), un borcan gol sau o sticla cu gatul larg, un recipient pentru spreyere.
                Puneti uleiul vegetal si sapunul lichid si scuturati bine, pana cand amestecul devine alb. Ati obtinut astfel concentratul deUlei Alb, care trebuie diluat cu apa pentru a putea fi folosit. In acest scop, adaugati 10 ml concentrat la un litru de apa (doua lingurite concentrat la un litru de apa) si scuturati bine. Acum puteti spreia plantele sau copacii dvs. Pastrati-l intr-un loc racoros si uscat, durata de depozitare este de aproximativ trei luni de la data prepararii.
Precautii: folositi-l doar cand vremea nu este foarte calda. Daca il folositi cand afara sunt temperaturi de treizeci de grade sau chiar mai mari, va cauza stricaciuni plantelor dumneavoastra, deoarece uleiul va astupa porii frunzelor. O idee buna este sa il folositi dimineata sau seara tarziu, dupa ce temperatura aerului a scazut. Deasemenea, nu il folositi pe plantele care au frunze sensibile sau frunze acoperite de perisori, va cauza arsuri frunzelor. Aplicati prin pulverizare pe ambele parti ale frunzelor, pe crengi si pe tulpina plantelor, pentru a ajunge si la daunatorii care s-ar putea sa fie ascunsi.
Cum functioneaza Uleiul Alb?
                Uleiul Alb functioneaza deoarece acopera insectele cu un strat de ulei, blocandu-le caile respiratorii, ceea ce le face sa se sufoce. Deoarece sufocarea este produsa de un fac-tor mecanic, nu de unul chimic, insectele nu se pot adapta niciodata la acest produs! Daca nu aveti sapun lichid, nu disperati, vom folosi ceea ce avem la indemana! Daca aveti sapun solid (natural, bineinteles – la noi este sapunul de casa, sigur gasiti asa ceva la tara) iata reteta de fabricare: ½ cana de ulei vegetal, 1 cana apa, o lingura de fulgi de sapun (dati pe razatoare o bucata de sapun), un pulverizator de plastic.
Radeti sapunul si puneti fulgii de sapun in sticla. Adaugati apa si uleiul vegetal si scuturati bine, pana la omogenizare. Astfel preparat, Uleiul Alb nu mai trebuie diluat, puteti sa spreiati plantele direct (cu precautiile de rigoare, bineinteles).


SAPUN DE POTASIU, COMBATERE DAUNATORI


Sapun de potasiu, combatere daunatori in gradini

Sapunul este unul din cele mai vechi insecticide, si se pare ca in acest domeniu stiinta nu si-a spus inca ultimul cuvant. Cele mai potrivite sapunuri pentru combaterea insectelor la plante sunt sapunurile de potasiu, care se fabrica folosindu-se ca lesie, hidroxidul de potasiu, si care au de regula, o consistenfa fluida (lichid sau pasta) Sapunurile solide se fabrica cu soda caustica [hdroxid de sodiu].

Delimitarea folosirii celor doua categorii de sapunuri în protectia plantelor nu este transanta. Precumpanitor este faptul sa se obtina solutii curate, fara sedimente (chiar si cu apa dura), cu un continut cat mai scazut in alcalii libere (hidroxizi liberi).

Aceste conditii sunt satisfacute in cel mai inalt grad de sapunurile necolorate, neparfumate, cu un pH cuprins intre 10 si 12. La noi in tara, in prezent, sapunul care satisface intr-o buna masura aceste conditii este sapunul de ras. Din informatiile primite de la specialistii romani reiese ca industria noastra este capabila sa produca orice fel de sapun, cu conditia sa existe piata sigura de desfacere.

Cele mai frecvente utilizari ale sapunului de potasiu sunt:

- Pentru combaterea paduchilor de frunza, in concentratie de  1.5 - 3%;

- Ca adeziv si muiant, pentru sporirea eficacitatii altor  preparate fitofarmaceutice, in concentratie de 0,5%. Astfel, in combinatie cu sulful muiabil, s-a constatat o sporire a eficacitatii sulfului si chiar o largire a spectrului sau de actiune (rapanul pomilor fructiferi);

- Ca repelent impotriva viermelui merelor si a viermelui pielitei fructelor de mar (câpua);

- Pentru prevenirea sau reducerea atacului unor boli, cum sunt fainarile.

Actiunea insecticida a sapunului se datoreaza continutului in acizi grasi, care nu trebuie sa fie mai mic de 40%, precum si distrugerii tegumentelor moi ale insectelor ori asfixierii acestora.

Actiunea asfixianta a sapunului este inferioara celei create de uleiurile minerale. Actiunea fungicida se explica, ca si in cazul fainii de bazalt, prin alcalinizarea pH-ului de la suprafata frunzelor.

Sapunul de potasiu, spre deosebire de sulful muiabil de exemplu, se poate, folosi si in zilele sau orele cu arsita, avand o compatibilitate deplina cu frunzele plantelor. Nu afecteaza intr-un mod semnificativ insectele folositoare. Nu se stabilesc timpi de pauza.

Pentru cei care prepara a sapunul de potasiu in gospodarie, sa mai spunem ca sapunul de potasiu poate avea o culoare verde, verde-galbuie sau galbuie si ca actiunea sa insecticida depinde si de felul acizilor grasi pe care ii contine.

Tratamente nepoluante impotriva musculitei albe de sera

Tratamente nepoluante impotriva musculitei albe de sera 
- Se stropeste plata atacata cu o solutie de sapun de potasiu (3%) si spirt (3%).
- Se stropeste planta cu o infuzie de vetricea (Tanacetum vulgare) la care se adauga 3% bentonita
- Se stropeste o infuzie concentrata de craite
- Se foloseste pentru stropit extractul de urzica, obtinut dintr-un kilogram de urzici tocate lasate sa macereze timp de 12 zile in 1o litri de apa.
- Se stropeste cu extract de feriga de camp (Pteridium aquilinum) obtinut tot dintr-un kilogram de frunze proaspete la 10 litri de apa. Solutia se poate folosi si pentru udat solul, indeparteaza melcii fara casa.
- Alte tratamente utilizeaza diferite preparate din crizantema salbatica (Tanacetum cinerariaefolium).

Combatere musculița albă: Cinci tratamente naturale care nu dau greș!

Combatere musculița albă: Cinci tratamente naturale care nu dau greș!

de 

Musculița albă de seră (Trialeurodes vaporariorum) este un dăunator prezent mai ales în solarii, sere și spații închise. Atacă inclusiv legumele și speciile ornamentale cultivate în apartamente sau în grădini. Agromonitor vă oferă soluții naturale testate și recomandate pentru combaterea musculiței albe.
musculita-alba-de-sera-combatere
Fiind vorba de soluții naturale, organice, pot fi utilizate cu succes în agricultura ecologică. Sunt foarte ușor de realizat și de pus în practică, costurile fiind aproape zero.

1. Combatere musculița albă – Capcane din PET

Se taie partea superioară a unei sticle pet și se așează invers, apoi se sigilează cu scoci, astfel încât să obținem un recipient cu o pâlnie la suprafață. În sticlă se toarnă câteva degete oțet de mere sau vin oțețit.

2. Combatere musculiță albă – Stropiri cu extracte de plante

Plantele atacate se stropesc cu zeamă de urzică. Se toacă urzicile și se lasă într-o găleată cu apă să fermenteze 12-24 de ore.
Tratamentul se reia la câteva zile folosind în loc de urzici infuzie de crăițe sau de ferigă, obținută din o sută de grame de plante la un litru de apă fierbinte.

3. Stropiri cu spirt și săpun de potasiu

Plantele atacate se stropesc cu o soluție de alcool medicinal diluat astfe: la doi litri de apă se adaugă un pahar de 100 ml de spirt. Spirtul poate fi înlocuit cu săpun moale de potasiu.

4. Stropiti cu infuzie de ardei iute

Plantele atacate se stropesc cu o infuzie de ardei iute obținută dintr-o linguriță de ardei uscat și pisat la 250 ml apă clocotită. Se utilizează pentru stropit după ce s-a strecurat și s-a răcit. Soluția poate fi înlocuită după câteva zile cu „mujdei” de usturoi, obținut din 2-3 căței de usturoi la 250 ml apă clocotită. Se răcește, se strecoară și se stropește ca atare sau diluat.

5. Capcane cleioase

Musculița albă este atrasă de culorile galben și oranj. Se decupează cartoane colorate și se ung cu un adeziv transparent. Se lasă în imediata vecinătate a plantelor.
Dacă nu doriți să utilizați metodele ecologice de combatere, puteți apela la insecticide omologate pentru combaterea musculiței albe.

17 Tips For Starting Your Own Herb Garden

http://www.buzzfeed.com/rachelysanders/how-to-grow-herbs-on-your-fire-escape?utm_term=.nblxZJmvZ&sub=3203818_2865277

17 Tips For Starting Your Own Herb Garden

Whether it’s on your balcony or in your tiny concrete backyard, it’s easier than you think to develop a green thumb in a big city.

City living doesn’t leave a lot of room for gardening.

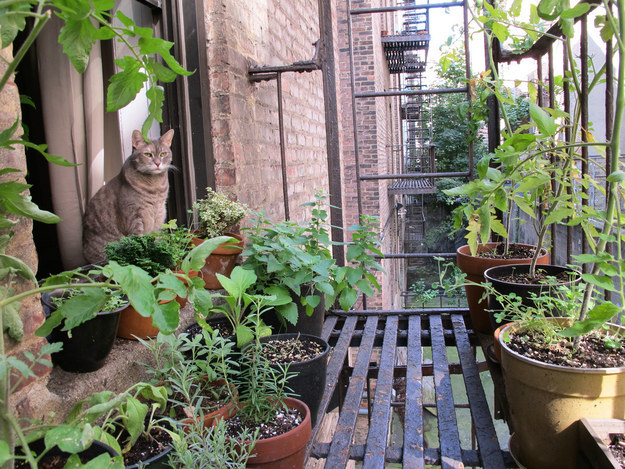
But it also doesn’t leave none. Your apartment probably (hopefully) has a fire escape, a balcony, or a patio. And that means you’ve got a little chunk of outdoor space that you can use to set up a kitchen garden of your very own.
Growing your own herbs is especially great because they don’t take much space and a little will go a long way in food. Also great: You don’t have to buy a huge bunch of parsley for a single recipe and then let the rest rot in the fridge. Instead, you can snip off just as much as you need at a time.
Here’s what you need to know to get started:

1. First things first: Make sure it’s safe.

First things first: Make sure it's safe.
Kristine Paulus / Flickr: kpaulus / Creative Commons
To be clear, storing items on a fire escape IS against fire code (at least in New York City), and for a reason — if you can’t actually walk on it or access the stairs/ladder, it’s not a very effective “escape.”
That said, if you’re careful to leave a clear, walkable path that will let someone access both the window and the ladder, you should still have space for a few pots that can really brighten up your life every day there isn’t a fire (which will hopefully be all of them).

2. And be discreet.

Even if you’re careful about making your fire escape garden safe, you may still get in hot water with your landlord or the relevant authorities if it’s easily visible to people on the street. And your little herb friends deserve a safe space! So, basically, don’t be stupid. If the fire escape isn’t behind your building or is too small to safely fill with pots, think about some other apartment-friendly gardening options instead.

3. Before you decide what to grow, assess your sunlight situation.

Before you decide what to grow, assess your sunlight situation.
Flickr: 42919152@N04 / Creative Commons
You need to know how much sun your plants will get, and how much they need. Most vegetables will do best in full sun (six-plus hours), but some greens and herbs are happy with less. On a fire escape, surrounding buildings or trees could block sun for part of the day, so check to make sure you hit the minimum for the type of plants you want (you can get that info from the little markers in their pots or from Google) before you buy seedlings.
To figure out how many hours you get, just keep an eye on the spot where your containers will be and make a note of when direct sunlight begins in the morning and ends in the evening. Or you can buy a little sun calculator to work it out for you.
Also keep in mind that the amount and direction of sun will change throughout the summer, so be prepared to move plants around for maximum ray catching if needed.

4. Gear up.

Gear up.
Photos via homedepot.com
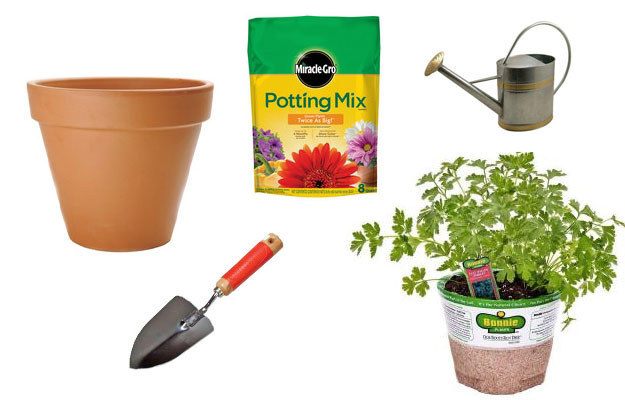
The timing of when you plant will vary depending on where you live. Basically, you can get started as soon as you’re sure temperatures won’t dip below freezing again. But don’t worry about missing some magical deadline; you can also continue planting things throughout the spring and summer. When you’re ready, here are the basic essentials you’ll need:
1. POTS: The size can vary depending on what you’re growing, but you want to make sure there’s enough depth for the plants’ roots to fully develop. You’ll probably want something at least 8” in diameter; it’s better to overestimate how much space you’ll need than underestimate. Here are some general guidelines for picking the right pot size and material.
2. POTTING SOIL: You want a potting mix that’s formulated for containers, not anything that says “garden soil.” Use this calculator to figure out how many bags of soil you’ll need based on the dimensions of your containers.
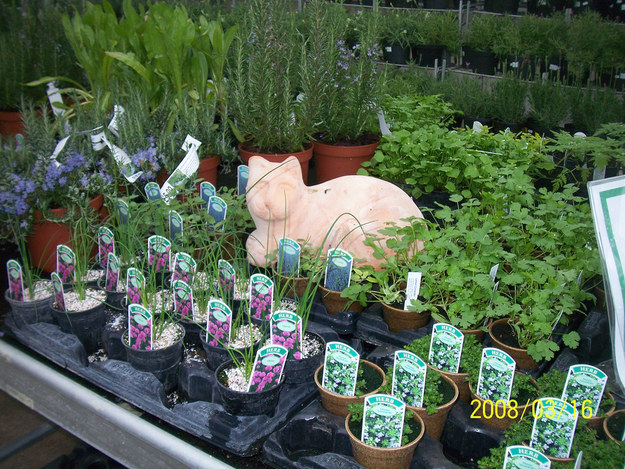
3. PLANTS: Farmers’ markets are a great local source for herb and vegetable seedlings in the spring. Hardware and garden stores should have a decent selectionas well.
A few other things that are nice to have, but not necessary: A trowel (for moving dirt around), a watering can (though you can also just use a large pitcher), and fertilizer to use once your plants are established (see item #14 in this post for more info).

5. Let a professional start your seedlings.

Let a professional start your seedlings.
Leonora Enking / Flickr: 33037982@N04 / Creative Commons
No matter what you’re growing, you should probably buy them as seedlings, not seeds. Yes, sprouting tiny baby plants from seeds can be magical and miraculous and all that jazz. But honestly, it’s not worth your time when you’ve got a small space and a relatively short growing season. Instead, buy established toddler herbs and vegetables at a farmer’s market or a nursery. You’ll get edible results much sooner and they’ll be less likely to die in infancy.

6. If you’re a beginner, start with basil.

If you're a beginner, start with basil.
Quinn Dombrowski / Flickr: quinnanya / Creative Commons
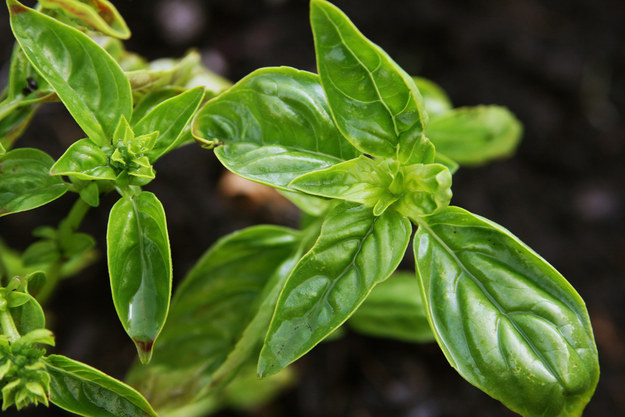
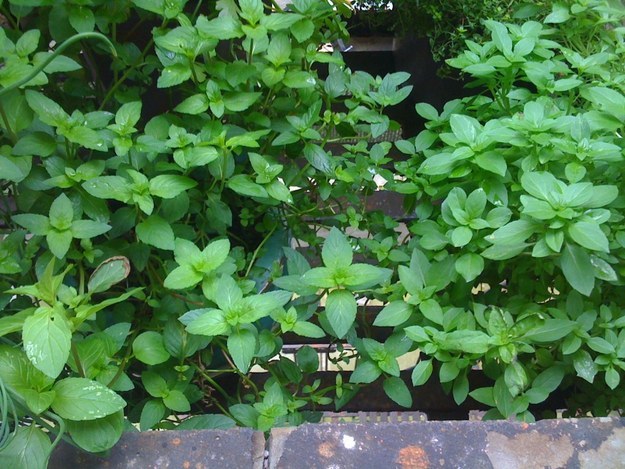
Basil is the herb that everyone loves and that loves everyone. It’s a very enthusiastic grower that smells and tastes great. It’s also helpful for gardeners without a lot of experience because basil will let you know right away if you’re not watering enough — by looking sad and wilty — but perks back up again after a good shower.

Just remember to trim basil from the top.

Just remember to trim basil from the top.
Dominic Alves / Flickr: dominicspics / Creative Commons
Always cut off the top of a basil plant instead of snipping leaves from the bottom or side of the main steam. If you take those lower leaves, you’ll just damage the plant’s solar power source, and make it grow tall and spindly instead of branching.
Don’t take off much more than a third of the plant’s height, and cut right above a spot where you see new little leaves sprouting from the stem. Those will go on to grow two new branches where you just had one stem before, which means a bushier, more compact plant.
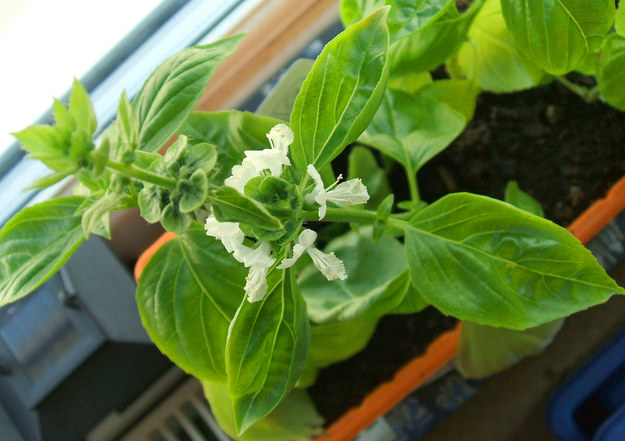
You should also aim to trim before any flowers bloom. They may be pretty, but they’re essentially the plant’s way of saying, “I’m quitting my job in order to have babies.” You want the plant to keep doing its job, i.e., producing nice, big leaves that you can turn into pesto, so snip the tops off as soon as you see buds.

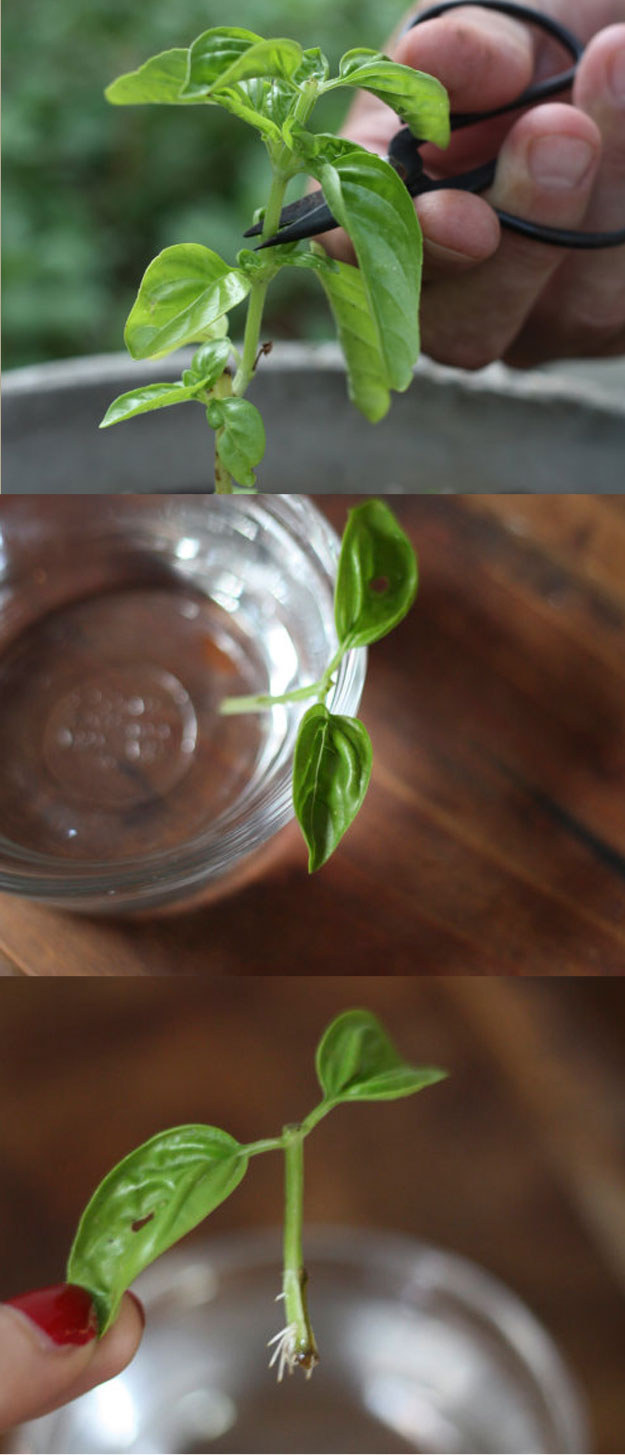
Side note: You can actually root and then plant basil straight from a cutting.

Side note: You can actually root and then plant basil straight from a cutting.
Give it a try it next time you have a few leftover sprigs. Once it has roots an inch or two long, you can just tuck it into a pot and let it rip.

7. If you want to go beyond herbs, leafy greens are a great starter vegetable.

If you want to go beyond herbs, leafy greens are a great starter vegetable.
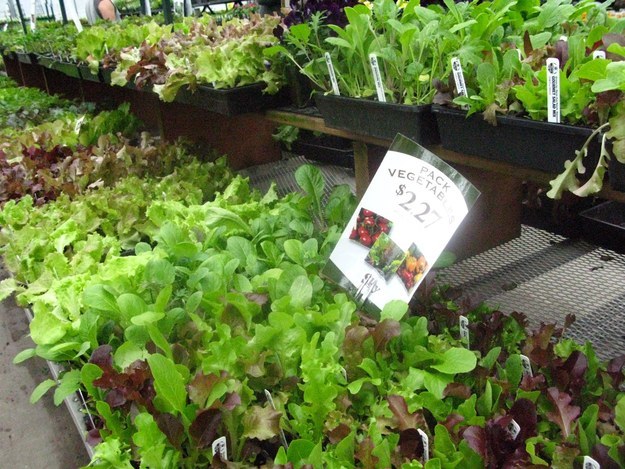
Debra Daniels-Zeller / foodconnections.blogspot.com
Greens like spinach, lettuce, and arugula work basically the same way as herbs: You can buy them as seedlings, plant them, and they’ll keep throwing up new leaves that you can harvest repeatedly. These grow quickly and get started right away, so you can have salad in the spring and early summer while you wait for other veggies like tomatoes to get rolling.
In the mid or late summer (or whenever your first round of greens stop producing new leaves), you can replace them with cold-weather-friendly greens like chard and kale, which will keep on going well into the fall.

8. Chives and scallions are easy to grow and fun to eat.

Chives and scallions are easy to grow and fun to eat.
Alice Henneman / Flickr: alicehenneman / Creative Commons
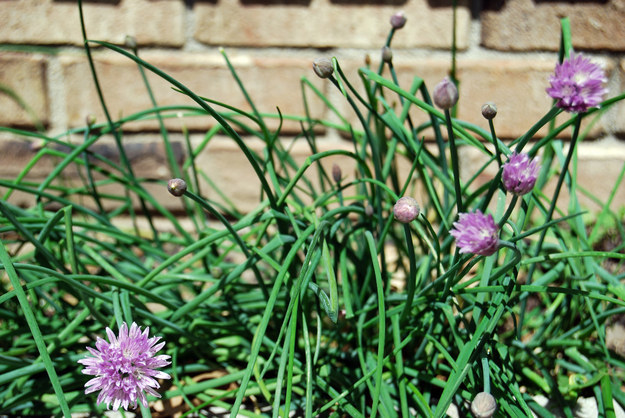
Fresh chives (above) are the kind of thing you might not buy, but will sprinkle on basically everything you cook if they happen to be growing right outside the window. They also bloom with pretty purple flowers!
Scallions are easy to grow in small containers, and you can get them started just by going to the grocery store and picking a bunch that have healthy-looking white roots on the end of the bulb (instructions here). Then you can harvest the green tops throughout the summer and leave the bulbs to keep producing.
Even after you close up shop on the fire escape for winter, you can keep scallions going with just a cup of water.

9. If you want more substantial veggies, try small tomatoes, hot peppers, or green beans.

Chances are you’re not going to have enough space to grow something like zucchini, so stick with veggies that aren’t heavy and can do well in relatively small containers. Just keep an eye on tomato and bean plants — which can get very tall very quickly — and tie them to a stake or railing if they’re getting out of hand.

10. Mint grows like crazy (and requires some firm discipline).

Mint grows like crazy (and requires some firm discipline).
Mary Hartley / askmaryrd.com
Mint — particularly peppermint — is INSANE. It’s actually an unstoppable alien plant that will spread its runners and roots like nobody’s business; I once discovered my mint plant literally trying to sneak out of its pot and off the back of a second-story fire escape.
So mint should probably have a pot all to itself, or else it’ll just strangle anything else in there. It’ll also be less leggy and more bushy if you’re not shy about trimming and using it. This yummy maple-mint iced tea is a great way to go through bunches of it.

11. Plant things that go together well.

Plant things that go together well.
Oakley Originals / Flickr: oakleyoriginals / Creative Commons
Exotic stuff like “pineapple” mint and lemon verbena might seem appealing when you’re at the garden store, but you should pay attention to what you actually eat and cook with, and grow accordingly. Love salsa? Plant tomatoes, hot peppers, and cilantro.
You can also get fancy with “companion planting” certain things close to each other, which may help control pests.

12. Give each plant enough space.

Give each plant enough space.
Flickr: amerk / Creative Commons
Happy roots with room to grow mean happy plants with plenty of leaves down the line. You might be tempted to cram as many seedlings as you can into pots to get the most out of your real estate, but if they’re crowded they won’t produce as much, and then you’ll both be sad. Leave several inches between plants (here’s a helpful, more detailed discussion) and don’t put more than a few into one pot.
Also make sure that, if you’re combining multiple types of herbs in one pot, they all have about the same sun and water requirements.

13. Water often, but not too much.

Water often, but not too much.
Rebecca Wilson / Flickr: saucysalad / Creative Commons
Herbs are delicate critters and need a little more babysitting than most houseplants. Remember that a fire escape made out of black metal is going to get really hot, and your pots probably aren’t that big; both contribute to the soil drying out faster. You can slow down the drying process a little bit by covering the soil with a layer of mulch, but you’ll still want to check it about every other day (or every day during hot weather).
To check, poke your finger into the pot, and if the dirt is dry an inch below the surface, it’s time to water. That said, you don’t want to drown the plants, so just water until the soil is damp all the way through, not soaking wet. And if your pots don’t have much in the way of drainage holes, err on the side of watering less, more often.

14. Make sure your pots and containers have enough drainage.

Make sure your pots and containers have enough drainage.
Mike Lieberman / Flickr: canarsiebk / Creative Commons
You want to be sure that the pots don’t just hold onto water and turn into root-rotting swamps. The easiest, most important thing to do is buy pots that have at least a few good-sized drainage holes in the bottom (though you may want to set them over a tray so you don’t end up dripping mud onto your downstairs neighbor’s head).
Keep in mind that putting chunky material like rocks or pot shards in the bottom of a container is kind of a myth and won’t actually increase drainage. The most important thing is using potting soil (not just dirt from the ground) that has little granules of perlite and other minerals that keep it from getting water-logged.
If you want to try a level 2.0 project, it’s actually pretty simple to build cool self-watering bucket containers with cheap recycled materials.

15. Keep your dirt healthy.

Keep your dirt healthy.
Bob / Flickr: 28538827@N05 / Creative Commons
You might think that dirt is just dirt, and any dirt will do. Wrong!
Start your plants in new potting soil (the kind that comes in a bag at the garden store) or, if you’re reusing old soil, remove any dead roots and mix in some compost or fertilizer. Then give things a little boost as needed throughout the season. You can use water-soluble chemical fertilizers about every two weeks, or try organic alternatives like coffee grounds, seaweed, or “liquid fish.”
Why? If you want your plants to keep producing throughout the summer, it’s important that the soil they’re growing in is aerated enough to let oxygen through and provides enough nutrients. When you’re watering small containers frequently (which you should), you end up flushing out the nutrients in potting soil to begin with.

16. Be prepared for pests.

Be prepared for pests.
Flickr: peapod51 / Creative Commons
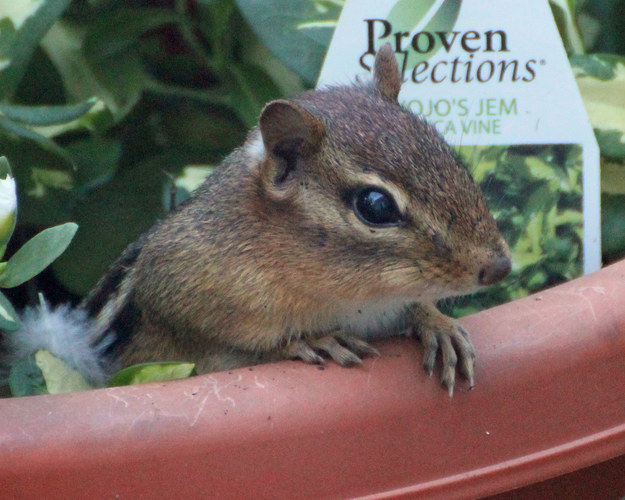
Squirrels suck. They just do. They will dig up an entire three-foot-long container, CONVINCED that it’s full of buried acorn treasure (it isn’t! I checked!) and not give a shit that they just destroyed your lovingly tended micro-farm in the process.
If you’re having problems, you can try your luck with any number of possible solutions: bloodmeal fertilizer, plastic mesh or chicken wire, cayenne pepper, or even good old-fashioned rocks. I confess that my weird DIY method of weaving a deterrent latticework out of bamboo kabob skewers only…kinda sorta works. But I’m not giving up yet.

17. Give sick plants a chance to get better.

Give sick plants a chance to get better.
Chris Tse / Flickr: asiaticleague / Creative Commons
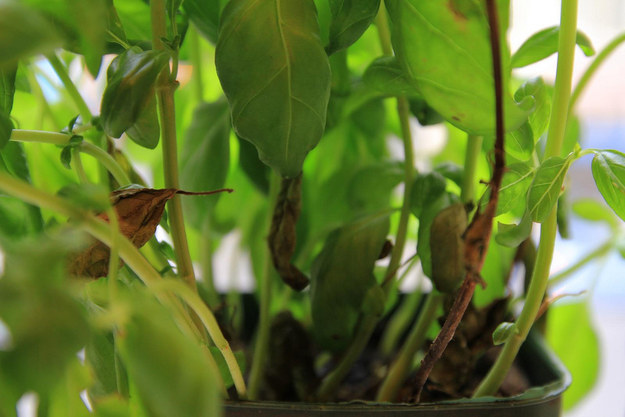
You can troubleshoot a lot of common problems, like yellow leaves (which might mean too much water or not enough nitrogen). If you really think a plant is beyond repair, do a thorough inspection and give it a little time before you hold a funeral.

So, those are the basics. Now all you have to do is plant…

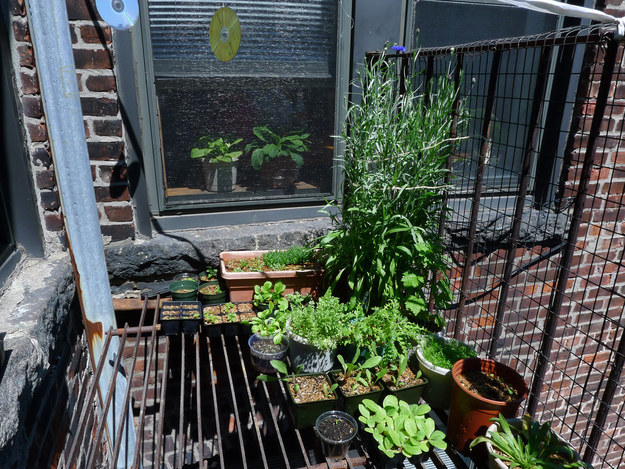
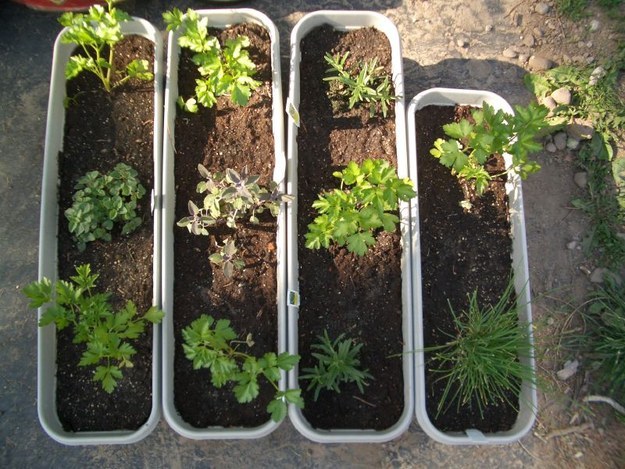
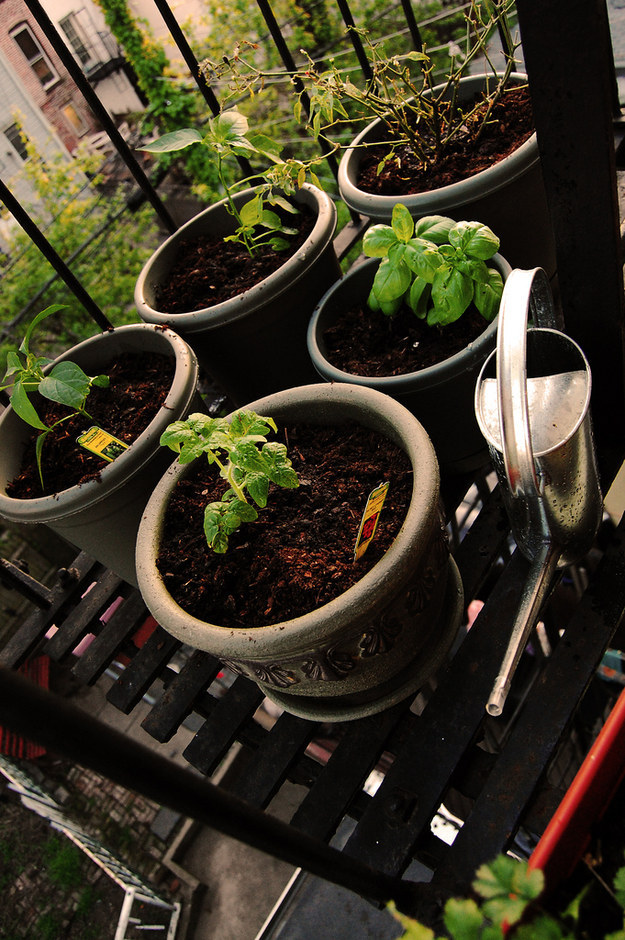
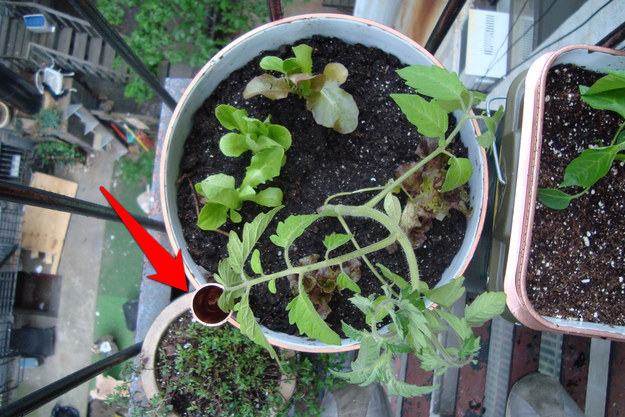
My setup last summer (IDK what’s happening with that tragic dill, sorry).

…and don’t forget to eat what you grow.

It sounds stupid, but it’s weirdly easy to get obsessed with watching your plants get BIGGER AND BETTER and completely forget that the reason you’re growing them in the first place is so that you can eat them.
If you start to get overwhelmed with the volume of herbs your plants are producing, remember that you can use them a lot more aggressively than you might think.
Try making a summery, herb-heavy tabbouleh, this steak salad with herbs, or consider that you can turn basically anything into pesto.