17 Tips For Starting Your Own Herb Garden

http://www.buzzfeed.com/rachelysanders/how-to-grow-herbs-on-your-fire-escape?utm_term=.nblxZJmvZ&sub=3203818_2865277
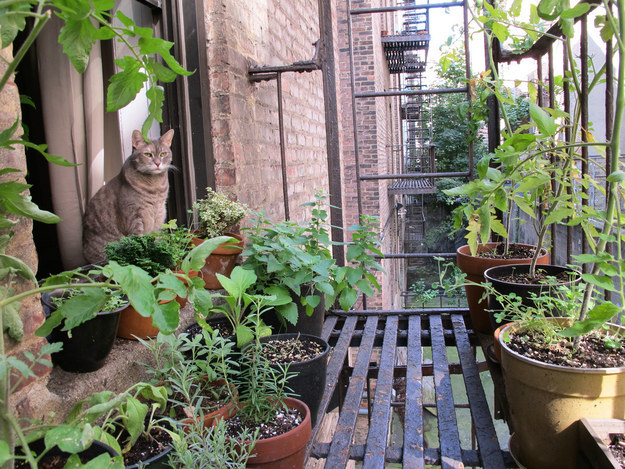
17 Tips For Starting Your Own Herb Garden

Whether it’s on your balcony or in your tiny concrete backyard, it’s easier than you think to develop a green thumb in a big city.

City living doesn’t leave a lot of room for gardening.

But it also doesn’t leave none. Your apartment probably (hopefully) has a fire escape, a balcony, or a patio. And that means you’ve got a little chunk of outdoor space that you can use to set up a kitchen garden of your very own.
Growing your own herbs is especially great because they don’t take much space and a little will go a long way in food. Also great: You don’t have to buy a huge bunch of parsley for a single recipe and then let the rest rot in the fridge. Instead, you can snip off just as much as you need at a time.
Here’s what you need to know to get started:

1. First things first: Make sure it’s safe.

First things first: Make sure it's safe.
Kristine Paulus / Flickr: kpaulus / Creative Commons
To be clear, storing items on a fire escape IS against fire code (at least in New York City), and for a reason — if you can’t actually walk on it or access the stairs/ladder, it’s not a very effective “escape.”
That said, if you’re careful to leave a clear, walkable path that will let someone access both the window and the ladder, you should still have space for a few pots that can really brighten up your life every day there isn’t a fire (which will hopefully be all of them).

2. And be discreet.

Even if you’re careful about making your fire escape garden safe, you may still get in hot water with your landlord or the relevant authorities if it’s easily visible to people on the street. And your little herb friends deserve a safe space! So, basically, don’t be stupid. If the fire escape isn’t behind your building or is too small to safely fill with pots, think about some other apartment-friendly gardening options instead.

3. Before you decide what to grow, assess your sunlight situation.

Before you decide what to grow, assess your sunlight situation.
Flickr: 42919152@N04 / Creative Commons
You need to know how much sun your plants will get, and how much they need. Most vegetables will do best in full sun (six-plus hours), but some greens and herbs are happy with less. On a fire escape, surrounding buildings or trees could block sun for part of the day, so check to make sure you hit the minimum for the type of plants you want (you can get that info from the little markers in their pots or from Google) before you buy seedlings.
To figure out how many hours you get, just keep an eye on the spot where your containers will be and make a note of when direct sunlight begins in the morning and ends in the evening. Or you can buy a little sun calculator to work it out for you.
Also keep in mind that the amount and direction of sun will change throughout the summer, so be prepared to move plants around for maximum ray catching if needed.

4. Gear up.

Gear up.
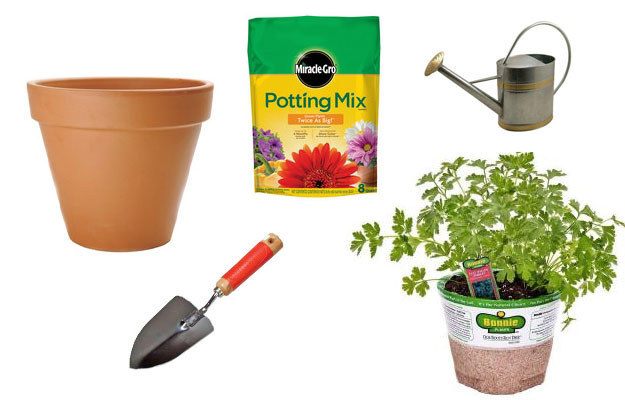
Photos via homedepot.com
The timing of when you plant will vary depending on where you live. Basically, you can get started as soon as you’re sure temperatures won’t dip below freezing again. But don’t worry about missing some magical deadline; you can also continue planting things throughout the spring and summer. When you’re ready, here are the basic essentials you’ll need:
1. POTS: The size can vary depending on what you’re growing, but you want to make sure there’s enough depth for the plants’ roots to fully develop. You’ll probably want something at least 8” in diameter; it’s better to overestimate how much space you’ll need than underestimate. Here are some general guidelines for picking the right pot size and material.
2. POTTING SOIL: You want a potting mix that’s formulated for containers, not anything that says “garden soil.” Use this calculator to figure out how many bags of soil you’ll need based on the dimensions of your containers.
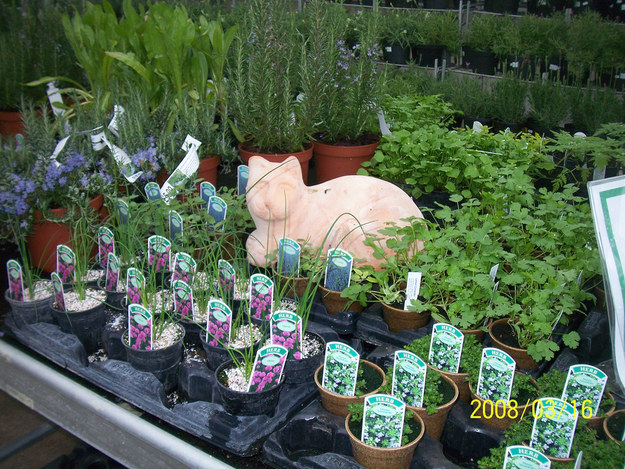
3. PLANTS: Farmers’ markets are a great local source for herb and vegetable seedlings in the spring. Hardware and garden stores should have a decent selectionas well.
A few other things that are nice to have, but not necessary: A trowel (for moving dirt around), a watering can (though you can also just use a large pitcher), and fertilizer to use once your plants are established (see item #14 in this post for more info).

5. Let a professional start your seedlings.

Let a professional start your seedlings.
Leonora Enking / Flickr: 33037982@N04 / Creative Commons
No matter what you’re growing, you should probably buy them as seedlings, not seeds. Yes, sprouting tiny baby plants from seeds can be magical and miraculous and all that jazz. But honestly, it’s not worth your time when you’ve got a small space and a relatively short growing season. Instead, buy established toddler herbs and vegetables at a farmer’s market or a nursery. You’ll get edible results much sooner and they’ll be less likely to die in infancy.

6. If you’re a beginner, start with basil.

If you're a beginner, start with basil.
Quinn Dombrowski / Flickr: quinnanya / Creative Commons
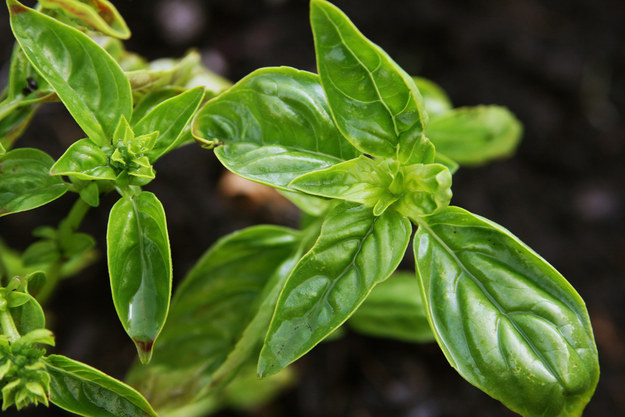
Basil is the herb that everyone loves and that loves everyone. It’s a very enthusiastic grower that smells and tastes great. It’s also helpful for gardeners without a lot of experience because basil will let you know right away if you’re not watering enough — by looking sad and wilty — but perks back up again after a good shower.

Just remember to trim basil from the top.

Just remember to trim basil from the top.
Dominic Alves / Flickr: dominicspics / Creative Commons
Always cut off the top of a basil plant instead of snipping leaves from the bottom or side of the main steam. If you take those lower leaves, you’ll just damage the plant’s solar power source, and make it grow tall and spindly instead of branching.
Don’t take off much more than a third of the plant’s height, and cut right above a spot where you see new little leaves sprouting from the stem. Those will go on to grow two new branches where you just had one stem before, which means a bushier, more compact plant.
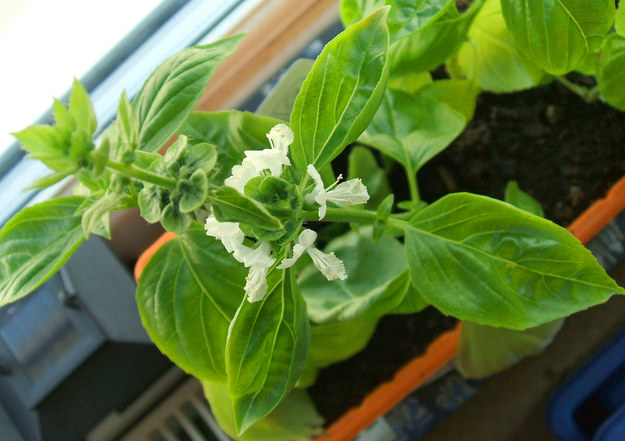
You should also aim to trim before any flowers bloom. They may be pretty, but they’re essentially the plant’s way of saying, “I’m quitting my job in order to have babies.” You want the plant to keep doing its job, i.e., producing nice, big leaves that you can turn into pesto, so snip the tops off as soon as you see buds.

Side note: You can actually root and then plant basil straight from a cutting.

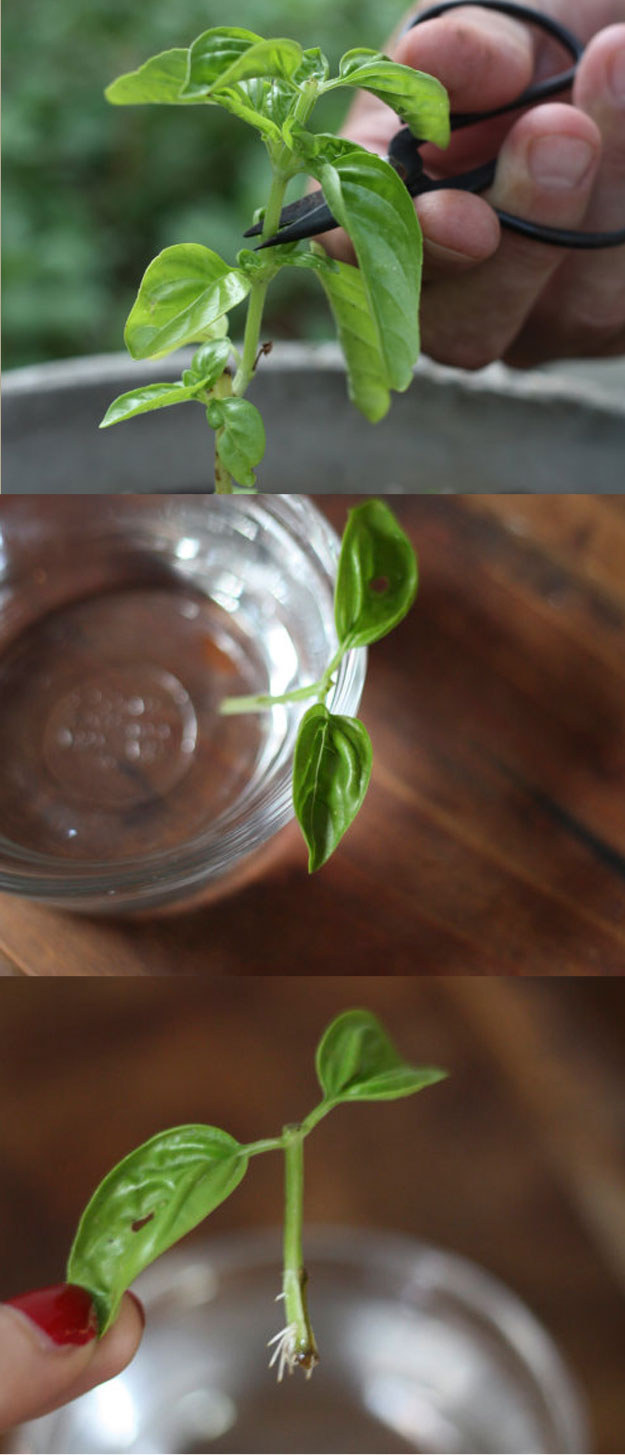
Side note: You can actually root and then plant basil straight from a cutting.
Give it a try it next time you have a few leftover sprigs. Once it has roots an inch or two long, you can just tuck it into a pot and let it rip.

7. If you want to go beyond herbs, leafy greens are a great starter vegetable.

If you want to go beyond herbs, leafy greens are a great starter vegetable.
Debra Daniels-Zeller / foodconnections.blogspot.com
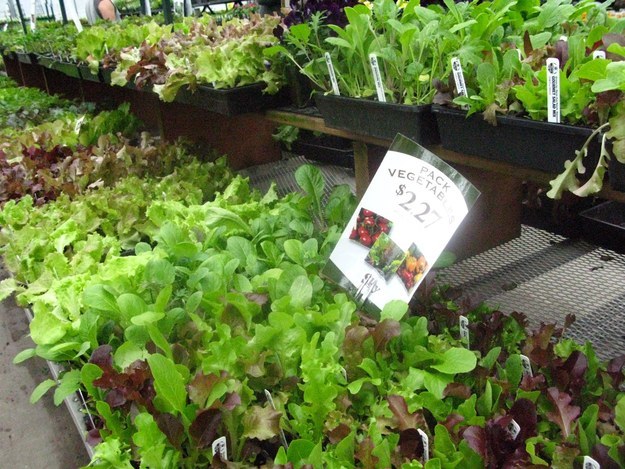
Greens like spinach, lettuce, and arugula work basically the same way as herbs: You can buy them as seedlings, plant them, and they’ll keep throwing up new leaves that you can harvest repeatedly. These grow quickly and get started right away, so you can have salad in the spring and early summer while you wait for other veggies like tomatoes to get rolling.
In the mid or late summer (or whenever your first round of greens stop producing new leaves), you can replace them with cold-weather-friendly greens like chard and kale, which will keep on going well into the fall.

8. Chives and scallions are easy to grow and fun to eat.

Chives and scallions are easy to grow and fun to eat.
Alice Henneman / Flickr: alicehenneman / Creative Commons
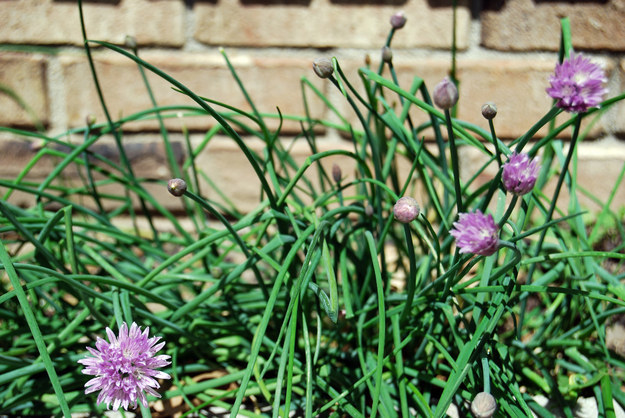
Fresh chives (above) are the kind of thing you might not buy, but will sprinkle on basically everything you cook if they happen to be growing right outside the window. They also bloom with pretty purple flowers!
Scallions are easy to grow in small containers, and you can get them started just by going to the grocery store and picking a bunch that have healthy-looking white roots on the end of the bulb (instructions here). Then you can harvest the green tops throughout the summer and leave the bulbs to keep producing.
Even after you close up shop on the fire escape for winter, you can keep scallions going with just a cup of water.

9. If you want more substantial veggies, try small tomatoes, hot peppers, or green beans.

Chances are you’re not going to have enough space to grow something like zucchini, so stick with veggies that aren’t heavy and can do well in relatively small containers. Just keep an eye on tomato and bean plants — which can get very tall very quickly — and tie them to a stake or railing if they’re getting out of hand.

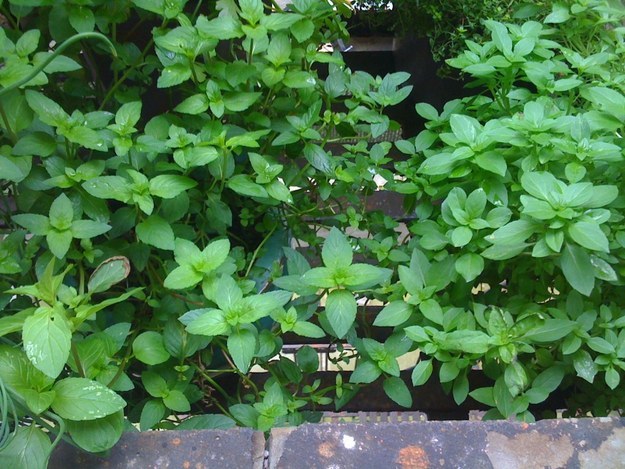
10. Mint grows like crazy (and requires some firm discipline).

Mint grows like crazy (and requires some firm discipline).
Mary Hartley / askmaryrd.com
Mint — particularly peppermint — is INSANE. It’s actually an unstoppable alien plant that will spread its runners and roots like nobody’s business; I once discovered my mint plant literally trying to sneak out of its pot and off the back of a second-story fire escape.
So mint should probably have a pot all to itself, or else it’ll just strangle anything else in there. It’ll also be less leggy and more bushy if you’re not shy about trimming and using it. This yummy maple-mint iced tea is a great way to go through bunches of it.

11. Plant things that go together well.

Plant things that go together well.
Oakley Originals / Flickr: oakleyoriginals / Creative Commons
Exotic stuff like “pineapple” mint and lemon verbena might seem appealing when you’re at the garden store, but you should pay attention to what you actually eat and cook with, and grow accordingly. Love salsa? Plant tomatoes, hot peppers, and cilantro.
You can also get fancy with “companion planting” certain things close to each other, which may help control pests.

12. Give each plant enough space.

Give each plant enough space.
Flickr: amerk / Creative Commons
Happy roots with room to grow mean happy plants with plenty of leaves down the line. You might be tempted to cram as many seedlings as you can into pots to get the most out of your real estate, but if they’re crowded they won’t produce as much, and then you’ll both be sad. Leave several inches between plants (here’s a helpful, more detailed discussion) and don’t put more than a few into one pot.
Also make sure that, if you’re combining multiple types of herbs in one pot, they all have about the same sun and water requirements.

13. Water often, but not too much.

Water often, but not too much.
Rebecca Wilson / Flickr: saucysalad / Creative Commons
Herbs are delicate critters and need a little more babysitting than most houseplants. Remember that a fire escape made out of black metal is going to get really hot, and your pots probably aren’t that big; both contribute to the soil drying out faster. You can slow down the drying process a little bit by covering the soil with a layer of mulch, but you’ll still want to check it about every other day (or every day during hot weather).
To check, poke your finger into the pot, and if the dirt is dry an inch below the surface, it’s time to water. That said, you don’t want to drown the plants, so just water until the soil is damp all the way through, not soaking wet. And if your pots don’t have much in the way of drainage holes, err on the side of watering less, more often.

14. Make sure your pots and containers have enough drainage.

Make sure your pots and containers have enough drainage.
Mike Lieberman / Flickr: canarsiebk / Creative Commons
You want to be sure that the pots don’t just hold onto water and turn into root-rotting swamps. The easiest, most important thing to do is buy pots that have at least a few good-sized drainage holes in the bottom (though you may want to set them over a tray so you don’t end up dripping mud onto your downstairs neighbor’s head).
Keep in mind that putting chunky material like rocks or pot shards in the bottom of a container is kind of a myth and won’t actually increase drainage. The most important thing is using potting soil (not just dirt from the ground) that has little granules of perlite and other minerals that keep it from getting water-logged.
If you want to try a level 2.0 project, it’s actually pretty simple to build cool self-watering bucket containers with cheap recycled materials.

15. Keep your dirt healthy.

Keep your dirt healthy.
Bob / Flickr: 28538827@N05 / Creative Commons
You might think that dirt is just dirt, and any dirt will do. Wrong!
Start your plants in new potting soil (the kind that comes in a bag at the garden store) or, if you’re reusing old soil, remove any dead roots and mix in some compost or fertilizer. Then give things a little boost as needed throughout the season. You can use water-soluble chemical fertilizers about every two weeks, or try organic alternatives like coffee grounds, seaweed, or “liquid fish.”
Why? If you want your plants to keep producing throughout the summer, it’s important that the soil they’re growing in is aerated enough to let oxygen through and provides enough nutrients. When you’re watering small containers frequently (which you should), you end up flushing out the nutrients in potting soil to begin with.

16. Be prepared for pests.

Be prepared for pests.
Flickr: peapod51 / Creative Commons
Squirrels suck. They just do. They will dig up an entire three-foot-long container, CONVINCED that it’s full of buried acorn treasure (it isn’t! I checked!) and not give a shit that they just destroyed your lovingly tended micro-farm in the process.
If you’re having problems, you can try your luck with any number of possible solutions: bloodmeal fertilizer, plastic mesh or chicken wire, cayenne pepper, or even good old-fashioned rocks. I confess that my weird DIY method of weaving a deterrent latticework out of bamboo kabob skewers only…kinda sorta works. But I’m not giving up yet.

17. Give sick plants a chance to get better.

Give sick plants a chance to get better.
Chris Tse / Flickr: asiaticleague / Creative Commons
You can troubleshoot a lot of common problems, like yellow leaves (which might mean too much water or not enough nitrogen). If you really think a plant is beyond repair, do a thorough inspection and give it a little time before you hold a funeral.

So, those are the basics. Now all you have to do is plant…

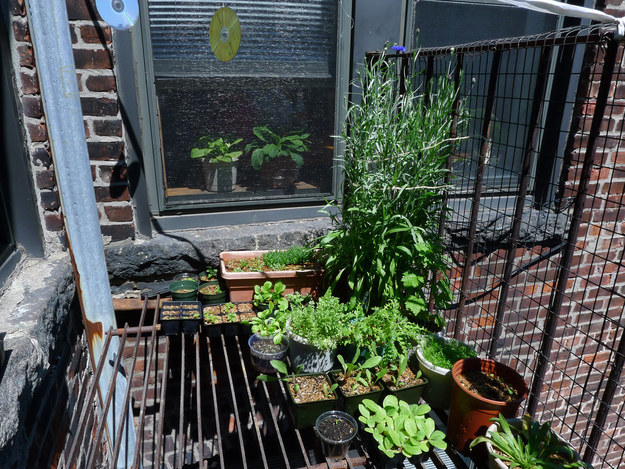
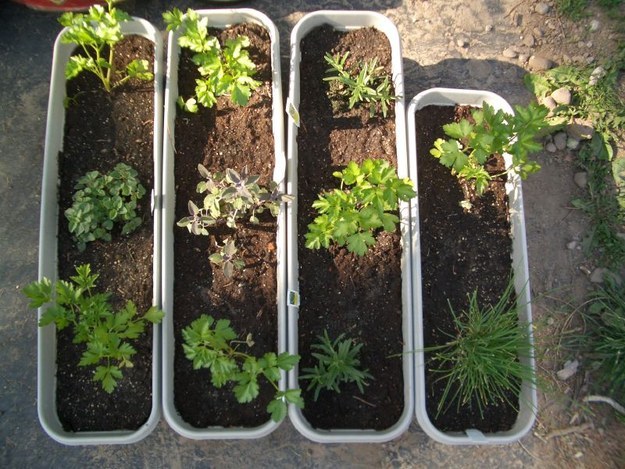
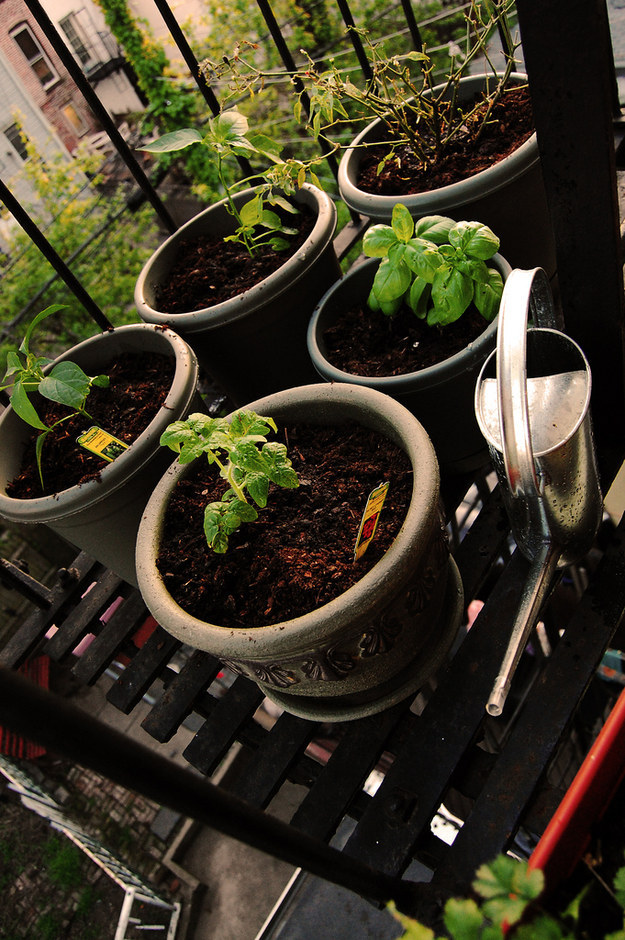
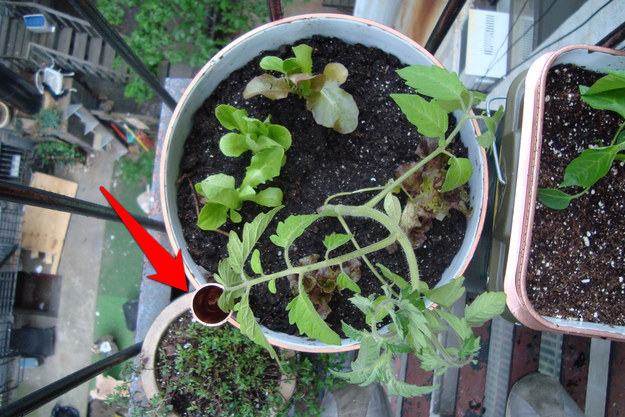
My setup last summer (IDK what’s happening with that tragic dill, sorry).

…and don’t forget to eat what you grow.

It sounds stupid, but it’s weirdly easy to get obsessed with watching your plants get BIGGER AND BETTER and completely forget that the reason you’re growing them in the first place is so that you can eat them.
If you start to get overwhelmed with the volume of herbs your plants are producing, remember that you can use them a lot more aggressively than you might think.
Try making a summery, herb-heavy tabbouleh, this steak salad with herbs, or consider that you can turn basically anything into pesto.

Bokashi – 10 lucruri important de știut. De ce trebuie să fie în orice casă?


Bokashi-SeedItForward
Bokashi este o formă de fermentare anaerobă folosită pentru pre-compostarea resturilor alimentare, care sunt ulterior compostate complet și foarte repede pîna la obținerea solului bogat în nutrienți – humus.
În general bokashi înlatură mirosurile urîte și permite compostarea unei varietăți mai largi de resturi alimentare decît în cazul compostării obișnuite. Permite adăugarea oaselor mici, cantități mici de carne, uleiuri și mîncare gătită care altfel ar atrage șobolani și muști la grămadă de compost.
Procesul bokashi de bază constă în colectarea deșeurilor alimentare într-un container ermetic și adăugarea substratului inoculat cu microorganizme benefice. Acest substrat – „bokashi bran” sau tărîțe bokashi se vinde sau se poate prepăra acasă. Ca substrat poate fi orice material bogat în carbon, cum sunt tărîțele, rumeguș de lemn, hîrtie… care au fost infuzate cu bacterii și sursa de zăharuri.
Microorganizmele reprezintă un amestec comercializat de bacterii lacto-acide, drojdii și bacterii non-sulfurice purpurii EM-1. Însa este perfect posibil de a prepara substrat fără folosirea bacteriilor comerciale, aceste variații vor avea constituenți mai puțin cerți, numiți în general bacterii lacto-acide pentru ca acestea vor predomina.
Se pot găsi în vînzare găleți speciale Bokashi, care se deosebesc prin închidere ermetică, totodată avînd un fund dublu și un robinet mic pentru scurgerea surplusului de lichid – „suc sau ceai bocashi” ce poate fi diluat și folosit ca îngrăsămînt lichid. Este posibil de construit un sistem asemănător acasă, folosind 2 găleți de ~ 15 litri pentru a crea fund dublu, și a adăuga un robinet mic.
Odata ce căldarea se umple este lăsată 2 săptămîni sau mai mult pentru fermentare. Cînd procesul a decurs corect și suficient timp, conținutul va avea un miros de oțet sau drojdii și poate avea o peliculă bacterială la suprafață.
În final, resturile fermentate se transformă în sol fertil prin mai multe metode:
1. Se sapă o groapă acolo unde se planifică plantarea unor plante, se adăugă resturile fermentate în amestec cu sol. Peste 2-3 săptamîni se poate planta în solul astfel preparat.
2. Se poate adăuga direct la grămadă de compostare sau cîte puțin la viermicompost.
3. Se poate amesteca 1:1 cu sol obișnuit și lăsat într-un container închis, nu neapărat ermetic. În cîteva săptamîni se obține sol foarte prețios pentru plante de cameră și grădină.
Compostul Bokashi nu atrage insecte, șobolani și înlatură majoritatea patogenilor datorită aciditatii înalte (pH 3.5 – 4.5) în timpul procesului de fermentare.
Bokashi nu produce gaze de seră. Compostarea obișnuită produce CO2, iar dacă procesul devine anaerob se produce metan – la fel de dăunător în atmosferă. În procesul fermentării bokashi însă nu se produce căldură și CO2, iar bacteriile anaerobe producătoare de metan nu supraviețuiesc în mediu acid.
Procesul este foarte eficient - fermentarea decurge repede (1-2 săptămîni), iar odată îngropat (sau amestecat cu sol) materialul fermentat aproape complet devine sol în doar 2 săptămîni.

Utilizarea Serului Lactic (lactobacillus)

Utilizarea Serului Lactic (lactobacillus)


Daca tot am posibilitatea sa verific existenta bacteriilor lactice in preparate, dupa cateva cercetari vin cu o schimbare.
In frigider am observat ca aceste bacterii ” dispar” si, cum vreau sa obtin o cultura buna de lactice, am sa folosesc metoda cu zaharul, deoarece bacteriile lactice “se hranesc” cu el( si nu numai, dar el imi este cel mai la indemana). Deci voi pune zahar parte pe parte in serul initial si il voi pastra la temperatura camerei. Bine ca cercetez in continuare si luni, mai pun o astfel de proba la microscop sa vad daca este OK. Revin.
Cum utilizam serul lactic:
In postarea despre starter (serul lactocacillus), am invatat sa il facem si sper ca va fi ajutorul meu de nadejde in lupta impotriva bolilor ( in special mana), utilizandu-l in preventie.
ate
Serul initial il ” conservam” as spune, sau mai bine zis il tinem in viata ca si cultura de bacterii lactice cu zahar, parte pe parte si il tinem la temperatura camerei. Din acesta ne preparam solutia de lucru.Din serul  lacto initial pe care l-am preparat, se face solutia de lucru:
– 1 parte ser concentrat / 20 parti apa (neclorinata)
mai simplu, intr-o sticla de 500 apa, se pun 2 linguri de ser.

Din aceasta solutie se prepara celelalte solutii :))
1 lingura/ 1 litru apa, pentru plante, pulverizare foliara si pe sol
2 linguri /1 litru apa, pentru pulverizarea gramezii de compost
1 lingura/ litru, in galeata cu solutia de apa si ingrasamant organic, serul se pune inainte cu cateva ore, deobicei seara, inainte de ziua utilizarii continutului.
2 -3 linguri/litru apa pentru desfundarea si eliminarea mirosurilor urate din chiuvete, canalizari, incaperi animale
– probabil il voi folosi si pentru iaurt, dar despre cat de benefice sunt bacteriile lactice, voi vorbi intr-un alt articol :))
Ziarul Bokashi care se utilizeaza pentru compostarea Bokashi (intr-un articol viitor)
– 1 parte solutie de utilizat + 6 parti apa +1/3 parte zahar,
– se amesteca, se pune intr-o tava in care se pun la inmoi ziare, hartii..
Cand acestea s-au inmuiat bine, le trecem intr-un punga cu inchidere ziplock, scoatem aerul cat putem si le lasam la intruneric 10 zile, pentru o inoculare buna a ziarelor.
Dupa 10 zile, le scoatem, le uscam si le folosim ca inocule de bacterii lactice in compostul Bokashi.
In urmatorul articol voi forma o galeata cu compost, utilizand aceste ziare :))))
Gradinariti cu dragoste!

How to Make Bokashi


Bokashi – The Fermentation of Organic Wastes

For quite some time I’ve been meaning to learn more about the topic of bokashi. It seemed to be an interesting waste management method that quite a few people were talking about, and given my interest in various types of composting it only made good sense for me to see what all the fuss was about.
This past winter (2008) I finally stopped procrastinating and decided to dive in head-first by starting up my own bokashi experiment. I have written about bokashi quite a bit on the blog already, but realized that it would also be very beneficial to put together a bokashi resource page. This way if someone comes to the site looking for bokashi information, they can find a good overview here and get pointed in the right direction if they choose to dig a little deeper.
What Is Bokashi? | Why Bokashi? | Getting Started
Online Resources | Compost Guy Bokashi


What Is Bokashi?


Bokashi is a Japanese term meaning ‘fermented organic matter’. It is often referred to as a type of ‘composting’ but it is actually a anaerobic fermentation process, resulting in a much different end product than that produced via composting. Many people like bokashi because it is very easy, and generally (bad) odour-free. All that is needed is a bucket (with lid), some special bokashi mix, and of course some organic waste. This is a very basic overview – we’ll talk in much more detail about how to set up a bokashi bucket in the ‘Getting Started’section.


Why Bokashi?


There are a many good reasons for getting into the habit of NOT tossing your organic waste into the trash. As discussed on the Composting Basics page, organic waste makes up a considerable proportion of the total waste stream that ends up in the landfill (typically in the vicinity of 20-40%). This is unfortunate since, apart from needlessly taking up dwindling landfill space, these materials can easily be diverted and turned into a rich organic fertilizer (among other things). Let’s now look specifically at some of the pros and cons of bokashi:
    Advantages
  • It is really easy
  • It can be done on a small or large scale (so a good option for home owners)
  • It generally doesn’t produce bad odours (unlike a lot of anaerobic processes)
  • Produces a material that can be used as a ’slow-release’ fertilizer in your garden
  • Works great as a partner strategy to composting and vermicomposting
  • It can be used to deal with ALL kitchen wastes (even meat, dairy etc)
  • Admit it – just saying the word “Bokashi” is fun!!
  • 😆
    Disadvantages
  • You’ll need to make or purchase Bokashi mix
  • Need at least a couple buckets (assuming no other waste management strategies used) for continual Bokashi action
  • ‘Finished’ material is not really finished – still needs to be aged in soil or compost bin before beneficial for plants.
  • Even though it can be done on a small-scale, the end product needs to be put somewhere (ie. potential winter limitations).
As you can see, bokashi definitely has some great advantages, but there are also some important considerations to keep in mind. I personally like the idea of using bokashi as a partner strategy to various types of composting. The simple bucket system offers a hassle free way to quickly deal with food wastes, but it also serves as a great way to start the decomposition process – essentially preparing the materials for a much more rapid breakdown and stabilization in a compost/worm bin, or directly in your garden.


Getting Started With Bokashi


As discussed above, there are really only 3 important things needed to get started with bokashi – 1) Waste materials 2) A bokashi bucket and 3) Bokashi mix
Waste Materials – As I listed in the advantages of bokashi, you can add pretty well any type of food waste to a bokashi bucket. If you an are active composter you will likely know that there are some materials not recommended for a compost pile or worm bin – namely meats, oily foods and dairy. I’m still in the testing phase of this myself – I added some steak scraps and shrimp waste to one of my buckets and will be very curious to see how quickly these materials are broken down once they are added to an aerobic composting bin.
Bokashi Bucket – Experts typically recommend that you use a bucket with a spigot on it, so that you can drain the liquid that accumulates in the bottom as the waste materials decompose. Interestingly enough, some report that this liquid can be used as a plant fertilizer or even poured down your drain to eliminate odours. You can purchase complete bokashi kits (such as the one pictured to the right) if you want to do everything by the book. These commercially made buckets even have a false-bottom floor that keeps the waste materials separate from the leachate. For my preliminary bokashi experimentation I’ve simply been using regular plastic buckets with tight fitting lids. I added a layer shredded cardboard in the bottom to help prevent excess moisture from pooling. I would like to eventually purchase a bucket that has been designed specifically for bokashi, but for now my buckets seem t be working ok.
Bokashi Mix – The key component of a successful bokashi bucket is of course the bokashi mix – typically consisting of wheat bran inoculated with a special mixture of microbes, variously referred to as ‘effective microorganisms’, ‘friendly microorganisms’, or ‘efficient microorganisms’. The easiest (but most expensive) option is to purchase this mix ready-made – typically if you buy a bokashi kit it will include a bag of the microbial mix. If you are a more adventurous type you can also make it yourself. As I discovered, this is in fact much easier and enjoyable than it sounds, but thereare some important things to keep in mind. Making the mixture is very easy, but it’s the drying stage that may create some inconvenience for some people.
In hindsight I’m very glad I only ended up making a small amount (enough to fill two ziploc freezer bags), because the drying material took up a lot of space and it gave off a pretty powerful odour (I won’t say it was bad, but it was certainly…obvious)
While I suppose you don’t really have to dry the mixture out, this will definitely increase the shelf-life of the material – especially important if you are making large quantities.
In order to make the mix you will need some wheat bran, molasses, and some liquid microbial inoculum. Some suggest adding various other goodies as well (such as rock dust, kelp etc), but I decided to keep it simple and just go with the basics. Below is a great video from Neal ‘The Podchef’ Foley, from the Kitchen Garden Food Company. It demonstrates how to make the bokashi mix.
(I also provide links to some other helpful resources further down the page)
Bokashi ‘How-To’ – Once you have all of the 3 key components discussed above you are ready to get started. As mentioned, filling your bokashi bucket is incredibly easy. You simply add food scraps to your bucket, along with a handful of bokashi mix over top – that’s it! Continue doing this until you’ve filled the bucket completely. You may want to use a heavy plate of some sort to help press down the materials in the bucket. This will encourage the development of anaerobic conditions. I simply pressed the food down each time then put the lid on the bucket and everything seemed to work as claimed (i.e. no bad odours etc). Once your system is completely full, simply seal it up and let it sit for a couple of weeks so that it can further decompose. Any time after that you can dig the contents directly into your garden or add them to your compost pile or bins.

Cum să Facem Starterul Bokashi ( ser lactobacillus)

Cum să Facem Starterul Bokashi ( ser lactobacillus)

Despre Compostarea Bokashi nu am mai scris vreodata, este noutate pentru mine, dar sunt foarte incantata de multiplele utilizari ale acestuia, incat o sa o iau in serios.

Pentru compostarea Bokashi se utilizeaza un sistem de 2 galeti, dar vom ajunge si acolo, insa principalul ajutor este acest ser Lactobacillus care ajuta la o descompunere anaeroba si fara mirosuri neplacute. Cu ajutorul acestui ser, zahar si apa, se inmoaie ziare sau cartoane ca fiind purtatoare de inocul si acestea vor ajuta la descompunerea tuturor resturilor din bucatarie si producerea unui compost deoasebit.
Voi reveni cu amanunte, pana atunci ne pregatim serul. Odata pregatit putem sa ne facem propriile solutii fertilizatoare ” de acasa”( ex.solutia de peste, solutia pentru inflorire, compost din resturi menajere, compost din zat de cafea).
apa de orez

apa de orez strecurata
Pasul 1.
Se amesteca o parte orez si doua parti apa. Se agita energic si se scurge in alt vas. Lichidul ar trebui sa fie tulbure. Recipientul in care este pus lichidul ar trebuie sa fie 50-75% plin, deoarece are nevoie de spatiu sa fermenteze. Se acopera recipientul cu un tifon sau sita, lasand aerul sa circule. Se lasa sa stea la intuneric 5-8 zile. Lichidul trebuie sa aibe un miros usor acru. Se strecoara pentru a se elimina orice particule solide.
Pasul 2.
Punem solutia obtinuta intr-un recipient mai mare si se adauga 10 parti lapte. NU se sigileaza bine, pentru a lasa gazele sa iasa. Se lasa 14 zile pana deasupra recipientului se va forma un strat alb, mai gros( ca un fel de branza), lasand in partea de jos un lichid purificat. Acesta se extrage cu ajutorul unui furtunel.
Acum avem propriul Ser Lactobacillus.
Urmeaza update-uri cu poze si cu alte postari despre utilizarea serului.

Organic Bokashi Composting